


If you’ve ever checked your system and been greeted by an inverter isolation fault, you know the feeling—confusion mixed with frustration. Everything was working yesterday, the sun is shining, and suddenly your system refuses to cooperate.
I’ve dealt with inverter isolation fault issues on rooftops, in utility rooms, and in places where humidity alone can cause headaches. The truth? This fault is one of the most misunderstood yet most common problems in any solar inverter setup.
An inverter isolation fault means electricity is leaking somewhere it shouldn’t. Your inverter continuously checks whether the DC side of the system is electrically isolated from ground. If that isolation drops below a safe threshold, the inverter shuts down.
Think of it like water leaking from a pipe. Even a small leak triggers the alarm.
A solar inverter handles high DC voltage. Without proper isolation, that voltage can become dangerous—to equipment and to people. That’s why modern systems are extremely sensitive.
Most inverter isolation fault warnings come from the DC side, not the AC grid. Panels, cables, connectors, and junction boxes are usually the culprits.
If there’s one thing I’ve learned from years of working around PV systems, it’s this: an inverter isolation fault is rarely caused by one single dramatic failure. Much more often, it’s the result of small, everyday issues quietly stacking up over time. That’s exactly why these faults are so common, even in systems that look perfectly fine on the surface.
Let’s walk through the real reasons—based on field experience.
Moisture is enemy number one when it comes to an inverter isolation fault. Even systems installed correctly can struggle once nature gets involved. Rainwater, morning dew, coastal humidity, and condensation inside conduits all slowly reduce insulation resistance.
What makes this tricky is that moisture-related isolation faults are often intermittent. I’ve seen countless cases where the system throws an inverter isolation fault early in the morning, shuts down, and then mysteriously works again by midday once everything dries out. That doesn’t mean the problem is gone—it just means it’s waiting for the next wet cycle.
This is a classic example of why experience matters. On paper, everything looks fine. In real life, environmental exposure slowly eats away at insulation margins until the solar inverter has no choice but to protect itself.
DC cables live a hard life. They sit under constant voltage stress, are exposed to UV radiation, heat cycles, and mechanical movement from wind or thermal expansion. Over time, the insulation doesn’t fail all at once—it weakens little by little.
This gradual degradation is a major reason inverter isolation fault warnings appear years after installation. The system didn’t suddenly become unsafe; it simply crossed a safety threshold that had been shrinking for a long time.
What many people don’t realize is that insulation can look perfectly intact from the outside while failing electrically on the inside. That’s why visual checks alone often miss the true cause of an inverter isolation fault.
Some isolation faults are baked in from day one. Poor cable routing, excessive bending, cables pulled too tight, or connectors left slightly misaligned may not cause immediate failure—but they create weak points.
I’ve personally seen inverter isolation fault issues traced back to cables rubbing against metal edges or sitting in water traps for years. The installer may be long gone, but the problem eventually surfaces.
Real-world experience shows that many inverter isolation faults are delayed consequences, not sudden mistakes.
Grounding doesn’t just protect people—it also stabilizes measurements inside the solar inverter. Inconsistent grounding, poor bonding between panel frames, or floating metal parts can confuse the inverter’s monitoring system.
In some cases, the insulation resistance is technically acceptable, but unstable ground reference points trigger an inverter isolation fault anyway. This is especially common in older systems that were expanded or modified over time without rechecking the grounding layout.
The takeaway here is simple: isolation faults are not always about “bad components.” Sometimes they’re about systems that have drifted out of balance.
Modern PV systems cover large areas. That alone increases the odds of isolation issues. One nicked cable, one damp connector, or one compromised junction box is enough to pull the entire system below the isolation threshold.
That’s why inverter isolation fault problems scale with system size. The larger the array, the more potential failure points—and the harder it is to pinpoint the exact one without methodical testing.
Another reason inverter isolation faults are so common today is simple: systems are better at detecting them. Modern solar inverter designs monitor insulation resistance continuously and react faster than older systems ever did.
This isn’t a bad thing. It means higher safety standards and reduced risk. But it also means issues that might have gone unnoticed years ago now trigger a clear shutdown.
From a practical standpoint, many inverter isolation fault alerts are not signs of catastrophic failure—they’re early warnings that give you time to fix the root cause before it becomes dangerous or expensive.
One of the biggest mistakes I see is treating an inverter isolation fault as a one-time glitch. Resetting the system without addressing the underlying issue almost guarantees the fault will return.
Moisture paths, aging insulation, and grounding inconsistencies don’t heal themselves. They slowly worsen. That’s why isolation faults often start as rare events and eventually become daily shutdowns.
An inverter isolation fault rarely comes out of nowhere. In most cases, the system gives off clear warning signs—if you know what to look for. Over the years, I’ve noticed that people often ignore or misinterpret these symptoms, assuming they’re minor glitches. In reality, they’re the inverter’s way of saying, “Something isn’t electrically safe anymore.”
Below are the most common, real-world symptoms you’ll see when an inverter isolation fault is developing or already active.
The most obvious symptom is a direct warning on the display or monitoring interface stating inverter isolation fault or a related insulation alert. This message appears when the measured insulation resistance drops below a safe operating threshold.
From practical experience, these warnings may show up inconsistently at first. The system might run fine for days, then suddenly shut down with an isolation fault message, only to restart later. That inconsistency is often what causes people to underestimate the issue.
Another classic symptom of an inverter isolation fault is an unexpected shutdown even though the grid connection is stable and weather conditions are normal. The solar inverter disconnects intentionally to prevent unsafe operation.
What often confuses users is that there’s no visible damage and no external trigger. The inverter simply stops producing energy, sometimes multiple times a day. When this happens without any grid fault or overload, isolation problems should be high on the checklist.
One of the most telling signs of an inverter isolation fault is time-dependent behavior. The system may fail early in the morning, after rainfall, or during periods of high humidity, then resume normal operation later in the day.
This pattern almost always points to moisture affecting insulation somewhere in the DC side of the system. As temperatures rise and components dry out, insulation resistance temporarily improves—just enough for the solar inverter to restart.
From hands-on experience, this symptom is one of the strongest indicators that the fault is environmental rather than electronic.
In some cases, an inverter isolation fault doesn’t cause an immediate shutdown. Instead, you may notice unstable or reduced output first. Production graphs might show irregular dips or brief outages before the system finally stops altogether.
This usually happens when insulation resistance is hovering near the safety threshold. The inverter attempts to operate, detects unsafe conditions, and repeatedly pulls back. These early performance issues are easy to overlook but often precede a full isolation fault.
A temporary reset that “fixes” the problem is actually another symptom of an inverter isolation fault—not a solution. If the fault clears after restarting the system but comes back hours or days later, it strongly suggests an unresolved insulation issue.
In real-world scenarios, this cycle repeats until the underlying cause—such as damaged cabling or moisture ingress—is addressed. Relying on resets only allows the problem to worsen over time.
Some inverter isolation fault issues appear only when the system reaches higher DC voltages, such as during peak sunlight hours or cold weather. At higher voltage, even small insulation defects become electrically significant.
This is why a system may operate normally under low light but shut down once production ramps up. From a diagnostic perspective, this symptom helps narrow the issue to marginal insulation rather than a complete failure.
One of the most frustrating symptoms is the absence of visible damage. Everything looks clean, dry, and intact—yet the inverter isolation fault persists.
This is common because insulation failures are often internal. Micro-cracks, moisture inside connectors, or degraded cable jackets can all cause leakage paths that aren’t obvious during a basic inspection.
Experience plays a critical role here. Knowing that “nothing looks wrong” doesn’t mean “nothing is wrong” is key to proper troubleshooting.
Finally, inverter isolation faults tend to become more frequent if ignored. What starts as a rare shutdown during wet weather can evolve into daily interruptions, even in dry conditions.
This progression happens because insulation degradation, corrosion, and grounding inconsistencies don’t reverse themselves. They worsen with every weather cycle and thermal change.
In summary, the typical symptoms of an inverter isolation fault include warning messages, unexplained shutdowns, moisture-related behavior, unstable output, and recurring faults after resets. Recognizing these signs early allows you to address the root cause before the issue escalates into extended downtime or safety risks.
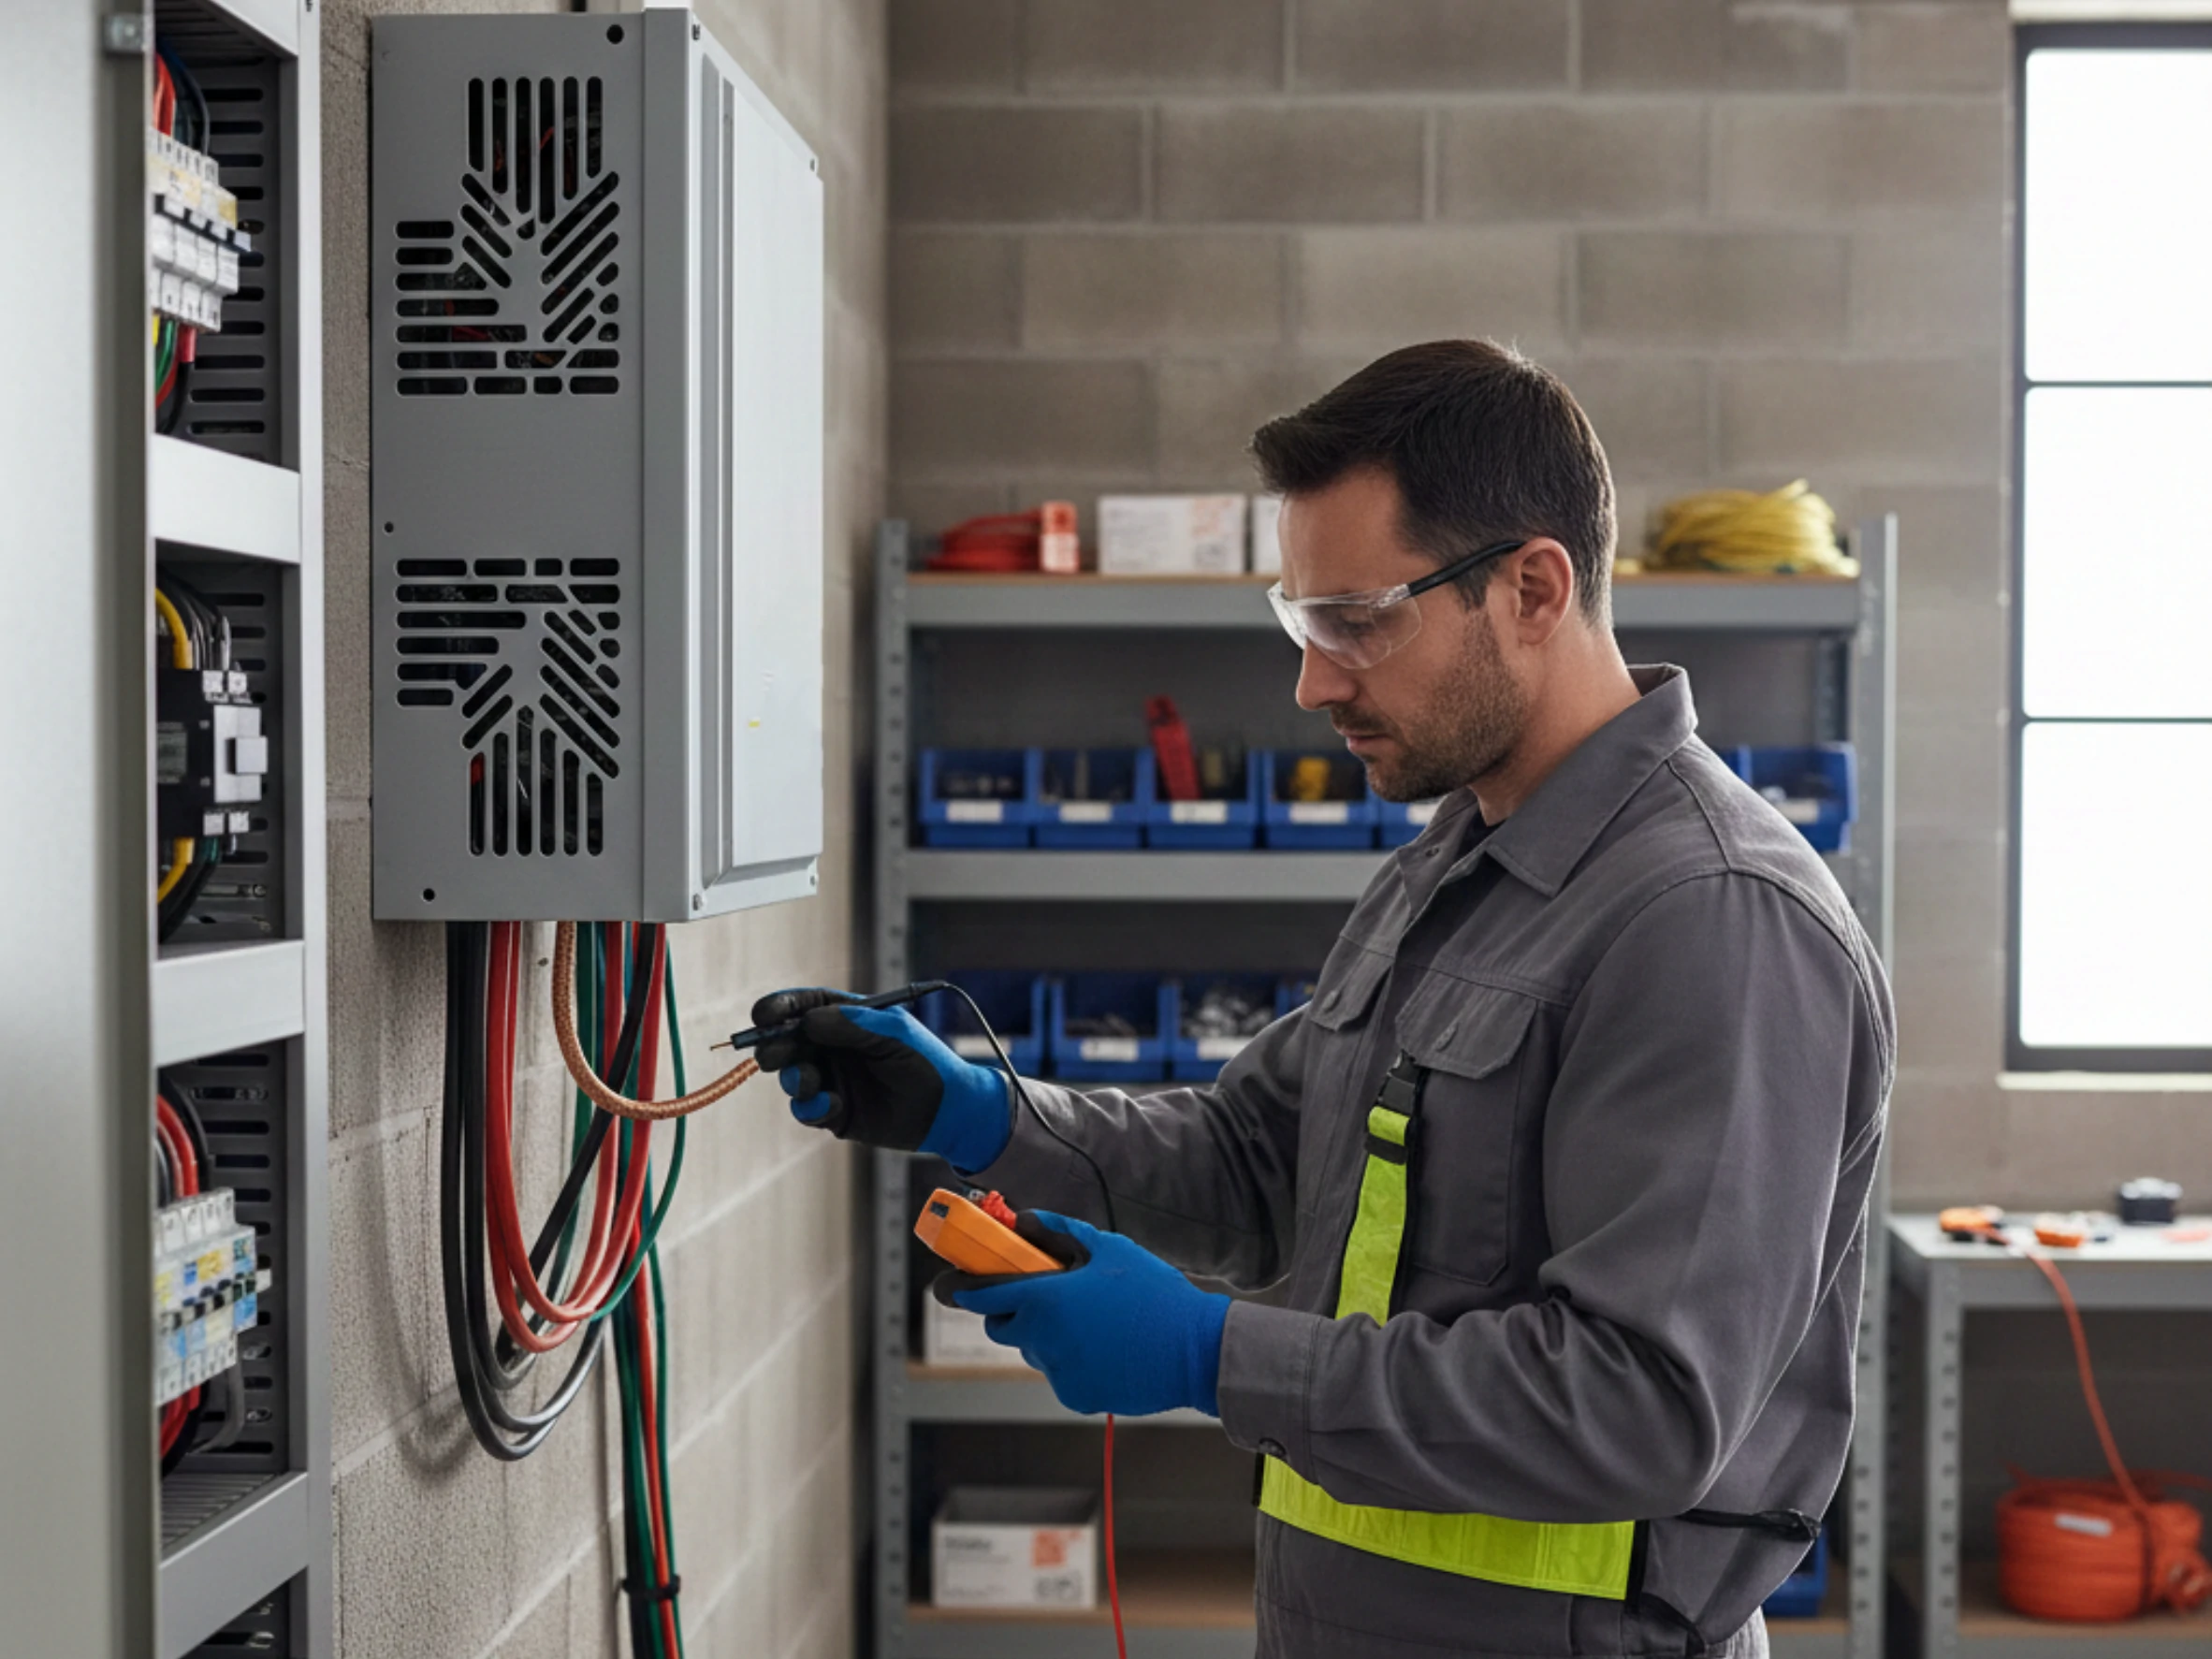
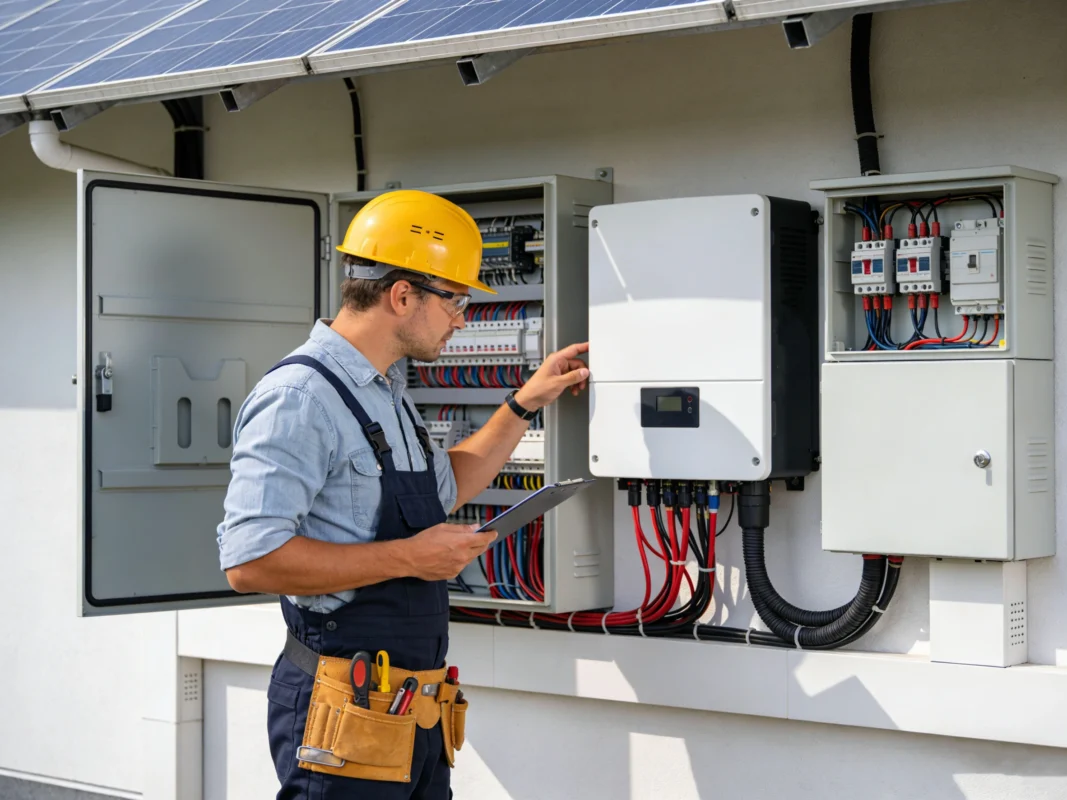
Diagnosing an inverter isolation fault is not about guessing or jumping straight to replacements. It’s a methodical process, and when done correctly, it saves time, money, and unnecessary downtime. Over the years, I’ve learned that most isolation faults can be traced in a logical way—as long as you respect safety rules and follow a clear sequence.
Before touching anything, safety comes first. An inverter isolation fault involves high DC voltage, and that’s not forgiving.
Start by fully shutting down the system:
This step isn’t optional. From experience, many misdiagnoses—and injuries—happen when people rush and test live circuits. Proper isolation ensures your measurements are accurate and safe.
Once the system is safely shut down, confirm that the issue is truly an inverter isolation fault and not a grid or communication error.
Check:
Documenting this context matters. These details often point toward moisture-related or voltage-dependent insulation issues later in the diagnosis.
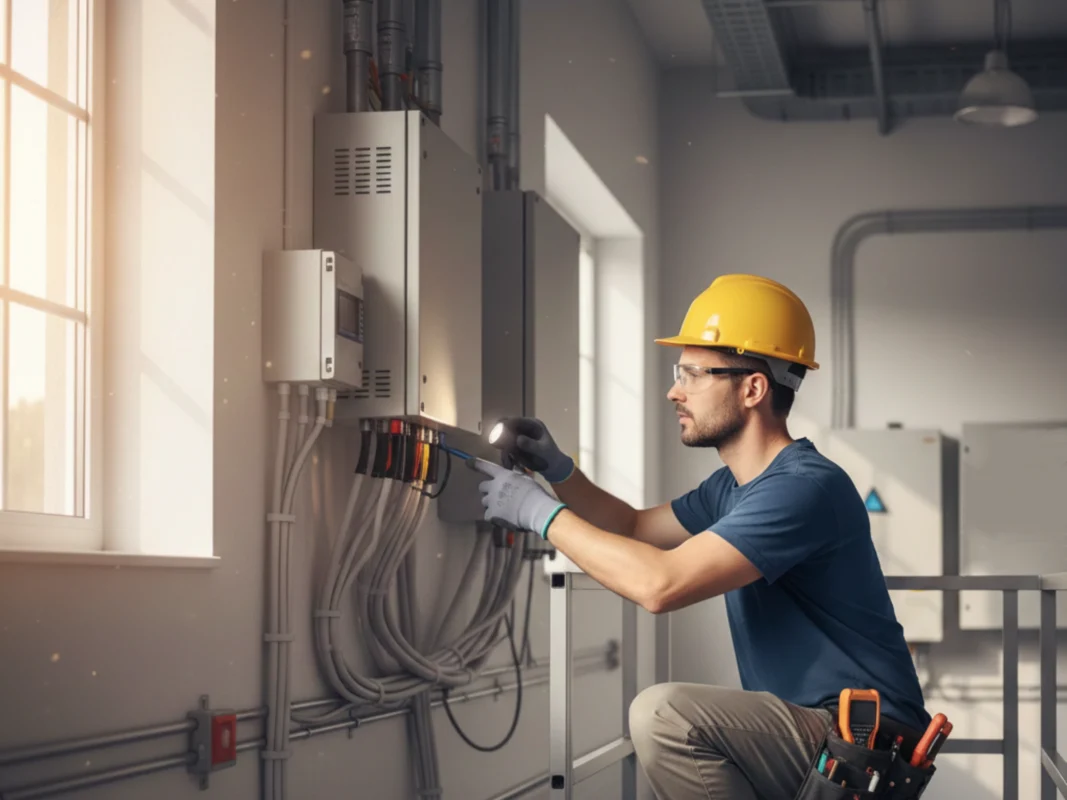
A careful visual inspection is where most diagnoses begin—and often end.
Look closely at:
In many inverter isolation fault cases, the problem is visible once you slow down and really look. Experience teaches you to trust your eyes before reaching for test equipment.
If nothing obvious stands out, the next step is to isolate sections of the DC system. Disconnect all DC strings from the solar inverter and reconnect them one at a time.
This process helps you identify whether:
If the inverter isolation fault clears with all DC inputs removed, the issue almost certainly lies in the field wiring or panels, not the inverter itself.
Insulation resistance testing is the most reliable way to locate an inverter isolation fault. This step requires proper testing equipment and a clear understanding of safe voltage levels.
Measure:
Low or unbalanced readings indicate leakage paths. In real-world troubleshooting, one string often stands out immediately with significantly lower insulation resistance.
Once a problematic string is identified, break it down further. Disconnect panels or cable sections until the insulation readings improve.
Common isolation fault locations include:
This is where patience pays off. Rushing this step often leads to partial fixes that don’t last.
If the inverter isolation fault only appears under certain conditions, factor that into your diagnosis.
Ask yourself:
These patterns almost always point to insulation issues rather than electronic failure. Timing-based behavior is one of the most powerful diagnostic clues available.
Grounding inconsistencies can mimic an inverter isolation fault. Check that all metallic components are properly bonded and that grounding paths are continuous.
Loose or corroded grounding connections can cause unstable reference points, leading the inverter to detect false leakage conditions. This step is often overlooked, yet it solves more problems than people expect.
Only after eliminating all external causes should you consider the inverter itself. In my experience, the inverter is responsible for isolation faults in a very small percentage of cases.
If the inverter isolation fault persists with all DC inputs disconnected and grounding verified, then internal insulation monitoring may be compromised. At that point, professional assessment is the correct next step.
Before restoring the system, document:
This record becomes invaluable if the inverter isolation fault returns. It also supports proper maintenance and future inspections.

Fixing an inverter isolation fault is less about quick resets and more about addressing the physical and electrical reasons the fault exists in the first place. From hands-on experience, the systems that stay stable long-term are the ones where the root cause is fully resolved, not just temporarily masked.
Below is a practical, field-tested approach to fixing an inverter isolation fault properly.
Before attempting any repair, make sure the fault location has been identified during diagnosis. Guessing is how isolation faults come back.
If testing showed one specific DC string with low insulation resistance, focus there. If the inverter isolation fault cleared only when all DC inputs were disconnected, that’s a strong sign the issue lies in the field wiring or panels, not the inverter itself.
Experience matters here: replacing parts without evidence almost never fixes an inverter isolation fault for good.
Moisture is one of the most common and fixable causes of an inverter isolation fault.
Steps that often solve the problem:
In many real-world cases, simply removing trapped moisture restores insulation resistance to safe levels. However, resealing is critical—drying without protection only delays the next fault.
If cable insulation is cracked, brittle, or nicked, replacement is the only reliable fix. Taping or sleeving over damaged sections may improve readings temporarily, but the inverter isolation fault will almost always return.
From experience, cables fail most often:
Replacing the full affected section ensures long-term stability and prevents hidden leakage paths.
Loose, improperly seated, or contaminated connectors are classic inverter isolation fault triggers.
Corrective actions include:
Connectors are small components, but they carry full system voltage. Even slight resistance or contamination can lower insulation enough to trigger a shutdown.
Grounding issues don’t always cause visible damage, but they frequently cause inverter isolation fault warnings.
Check that:
Stabilizing the grounding system often resolves intermittent isolation faults that appear without obvious insulation damage.
In some cases, a single defective panel or junction box is responsible for the entire inverter isolation fault.
Once identified:
This targeted approach minimizes downtime and avoids unnecessary system-wide replacements.
After any repair, insulation resistance must be measured again before restoring full operation.
This step confirms:
Skipping this step is one of the most common reasons isolation faults reappear.
When restarting the system, reconnect components step by step rather than all at once.
This allows you to:
This methodical restart reflects professional practice and reduces risk.
A proper fix doesn’t end when the inverter turns back on. Monitor the system through:
If the inverter isolation fault does not return under varying conditions, the repair can be considered successful.
There are situations where repair is no longer economical or reliable. Severely aged insulation, repeated moisture damage, or widespread degradation across multiple strings may justify replacement of affected sections.
From experience, continuing to patch a failing system often costs more in downtime than addressing the issue decisively.
Preventing an inverter isolation fault is far easier—and far cheaper—than dealing with one after your system starts shutting down. From long-term field experience, the systems that run for years without isolation issues all share the same traits: thoughtful installation, smart cable management, and regular attention to small details that most people overlook.
Below are the most effective, proven ways to reduce the risk of inverter isolation faults over the long run.
Many inverter isolation faults are the delayed result of installation shortcuts. Even if a system works perfectly on day one, poor practices often surface years later.
To prevent this:
From experience, isolation faults don’t usually start where people expect. They begin at stress points created during installation and slowly worsen with heat cycles and vibration.
Cable routing plays a huge role in preventing an inverter isolation fault. Water naturally follows gravity, and cables can unintentionally guide moisture directly into connectors or junction boxes.
Best practices include:
These simple design choices dramatically improve insulation lifespan and reduce moisture-related isolation issues.
Connectors and junction boxes are frequent isolation fault origins because they combine voltage, moisture, and movement.
Long-term prevention strategies:
From real-world observation, one poorly sealed connection is enough to trigger an inverter isolation fault across the entire system.
Stable grounding is essential for reliable insulation monitoring. Inconsistent or deteriorated grounding can cause false inverter isolation fault readings even when insulation is technically acceptable.
Preventive steps include:
Grounding systems age just like cables do. Treat them as maintenance items, not permanent fixtures.
You don’t need complex tools to prevent inverter isolation faults—just consistent observation.
A simple inspection routine should check for:
Catching these early prevents insulation resistance from dropping below safe thresholds.
Isolation faults rarely appear without warning. Intermittent shutdowns, moisture-related errors, or faults that clear after a reset are all early indicators.
From experience, addressing these signs early:
Ignoring early symptoms is one of the fastest ways to turn a minor issue into a recurring inverter isolation fault.
Systems installed in humid, coastal, or high-temperature environments need extra attention.
Preventive measures may include:
Environmental stress doesn’t cause immediate failure—but it accelerates insulation aging significantly.
Quick patches, taped cables, or unsealed repairs often make things worse over time. These temporary solutions may improve insulation readings briefly but tend to trap moisture or hide ongoing degradation.
Long-term prevention means:
Documenting inspections, repairs, and isolation fault events provides valuable insight into system health.
A simple log helps:
From a professional standpoint, this record is often what separates guesswork from informed troubleshooting.
There is no one-time fix that permanently eliminates inverter isolation faults. Systems age, environments change, and materials degrade.
The goal isn’t perfection—it’s early detection and consistent care. Systems that follow this approach experience fewer shutdowns, longer component life, and far fewer inverter isolation fault events over time.
Not all inverter errors are created equal. One of the biggest challenges I see in the field is misdiagnosis, where an inverter isolation fault is confused with other, very different problems. This often leads to wasted time, unnecessary part replacements, and repeated shutdowns.
Understanding how an inverter isolation fault compares to other common inverter errors helps you respond correctly—and fix the right thing the first time.
These two are often lumped together, but they’re not the same.
An inverter isolation fault occurs when the system detects unsafe electrical leakage between live DC conductors and ground due to reduced insulation resistance. It’s about insulation quality, not necessarily a direct short.
A ground fault, on the other hand, usually indicates a more direct and measurable connection between a live conductor and ground. Ground faults are often sudden and severe, while inverter isolation faults tend to develop gradually.
From real-world experience, isolation faults frequently appear before a ground fault would ever occur. In that sense, the inverter isolation fault acts as an early warning system rather than a sign of immediate failure.
An insulation warning is often misunderstood as something minor. In reality, it’s often the step just before an inverter isolation fault.
An insulation warning indicates that resistance levels are trending downward but haven’t yet crossed the shutdown threshold. If ignored, this warning frequently evolves into a full inverter isolation fault.
Experienced technicians treat insulation warnings as action items—not notifications to dismiss. Early intervention here prevents downtime later.
Grid errors are external. They involve voltage, frequency, or supply instability from outside the system. An inverter isolation fault is internal—it originates within the DC side of the installation.
A key diagnostic clue is timing. Grid-related errors often affect multiple systems in an area at once, while an inverter isolation fault affects only one system and may follow environmental patterns like rain or humidity.
Confusing the two can delay proper diagnosis by days or even weeks.

Overvoltage and overcurrent errors are load-related or configuration-related issues. They occur when system limits are exceeded, often during peak production or extreme conditions.
An inverter isolation fault behaves differently. It doesn’t care how much power is being produced—it cares whether electricity is leaking where it shouldn’t. That’s why isolation faults can occur even when output is low.
Understanding this difference helps prevent unnecessary system reconfiguration when the real issue lies in insulation integrity.
Communication errors are usually related to data links or monitoring hardware. They don’t affect electrical safety directly and rarely cause a full shutdown.
An inverter isolation fault always triggers protective action. The inverter shuts down because continuing to operate would be unsafe. That fundamental difference in severity is often overlooked.
If production stops completely, isolation faults should be considered before blaming monitoring or sensor issues.
There’s a point where an inverter isolation fault stops being a troubleshooting challenge and becomes a safety and reliability issue. Knowing when to call a professional isn’t a weakness—it’s good judgment. From real-world experience, the biggest problems don’t come from calling too early, but from waiting too long.
Below are the situations where professional intervention is not just recommended, but necessary.
Insulation resistance testing requires working with elevated DC voltages and specialized equipment. If you’re not trained to perform these tests safely, attempting them can be dangerous.
A professional understands:
If you’ve dried connections, inspected cables, and addressed visible issues—but the inverter isolation fault keeps returning—it’s time to escalate.
Recurring faults often indicate:
Professionals have the experience to recognize patterns that aren’t obvious during basic inspections.
An inverter isolation fault linked to a single DC string is usually manageable. When multiple strings show reduced insulation resistance, the situation becomes more complex.
This may point to:
At this stage, methodical testing and system-level evaluation are essential—and that’s professional territory.
Grounding problems are easy to overlook and hard to diagnose without proper testing. If there’s any uncertainty about bonding continuity or ground reference stability, a professional should step in.
Unstable grounding can:
Experience matters here, because grounding issues rarely announce themselves clearly.
Isolation faults that become more frequent over time are a warning sign of progressive deterioration. What starts as a rare shutdown during wet weather can quickly turn into daily outages.
This progression suggests:
Professionals can assess whether repair or partial replacement is the most reliable long-term solution.
Some systems are installed in locations that are difficult or dangerous to access. Roof pitch, height, weather exposure, or confined spaces all increase risk.
In these cases, calling a professional isn’t just about expertise—it’s about personal safety. No inverter isolation fault is worth a fall or injury.
In many situations, especially for long-term reliability and resale value, documented test results matter.
A professional can provide:
Although rare, internal issues can cause persistent inverter isolation fault messages even when external components test normally.
Professionals know how to:
At this point, guesswork becomes costly and ineffective.
When contacting a professional, clear information speeds up resolution. Be ready to explain:
This context allows for faster, more accurate diagnosis and avoids repeated testing.
An inverter isolation fault means the system has detected that electrical insulation between live DC conductors and ground has dropped below a safe level. In simple terms, electricity is leaking where it shouldn’t. The inverter shuts down to protect people, equipment, and the installation itself.
It can be. That’s why the system shuts down immediately. An inverter isolation fault indicates a potential safety risk, especially if moisture, damaged insulation, or grounding issues are involved. Ignoring it or repeatedly resetting the system without fixing the cause increases long-term risk.
Yes—very often. Moisture is one of the leading causes of inverter isolation fault events. Rain, condensation, fog, or high humidity can reduce insulation resistance, especially in connectors, junction boxes, and cable entry points. If the fault appears after rain or overnight and clears during the day, moisture is a strong suspect.
A reset doesn’t fix the problem—it only clears the warning temporarily. As conditions change (for example, components drying out), insulation resistance may briefly return to acceptable levels. The inverter isolation fault usually returns once moisture, voltage, or temperature conditions shift again.
In rare cases, a temporary moisture-related inverter isolation fault may disappear once everything dries. However, the underlying weakness—poor sealing, aging insulation, or cable damage—still exists. In practice, most isolation faults return and worsen if not properly addressed.
Usually, no. In most cases, the inverter is doing exactly what it’s supposed to do: detecting unsafe insulation conditions. The root cause of an inverter isolation fault is far more likely to be in DC cabling, connectors, grounding, or environmental exposure rather than the inverter itself.
Yes. Degraded backsheets, internal moisture ingress, or damaged junction boxes on panels can all create leakage paths. Even a single affected panel can trigger an inverter isolation fault for the entire system.
This often relates to voltage and environmental conditions. Higher DC voltage during peak sunlight or colder temperatures can expose marginal insulation. That’s why an inverter isolation fault may occur at midday, early morning, or only under specific weather conditions.
No. A ground fault usually involves a more direct electrical connection to ground, while an inverter isolation fault is about reduced insulation resistance and leakage. Isolation faults often appear first and act as an early warning before more severe faults develop.
Yes. Inconsistent grounding or bonding can cause unstable reference points, making the inverter think there’s insulation leakage when the issue is actually grounding-related. Proper grounding is essential for accurate isolation monitoring.
It depends on the cause. Some inverter isolation faults can be resolved in a few hours if the issue is obvious, such as moisture in a connector. Others may take longer if multiple strings or hidden insulation problems are involved. Accurate diagnosis is what saves time overall.
The biggest mistake is treating an inverter isolation fault as a nuisance error instead of a safety warning. Repeated resets, temporary patches, or ignoring early symptoms almost always lead to recurring shutdowns and higher repair costs later.