


Imagine acordar com o som de pássaros cantando em seus ouvidos em vez do barulho perturbador do gerador. A luz da manhã rompe o horizonte e inunda suavemente o cômodo. Nesse momento, seus dispositivos eletrônicos estão carregando silenciosamente, a geladeira no canto faz um zumbido suave, o ventilador também gira tranquilamente - e toda essa beleza, tudo a partir dessa energia solar pura e pacífica. Isso não faz você sentir que a vida é instantaneamente um pouco mais aconchegante e serena? Se esse parece ser o seu tipo de estilo de vida em um veículo recreativo, a instalação de painéis solares no veículo recreativo pode ser a sua próxima grande atualização.
Seja você um aventureiro que se atreve a fazer um passeio de fim de semana ou um viajante experiente, a instalação de painéis solares em seu trailer pode realmente abrir as portas para o mundo livre. Este guia atua como seu assistente pessoal, acompanhando-o desde a escolha do equipamento de painel correto até a instalação passo a passo e explicando o que você precisa saber de forma clara.
A instalação de painéis solares em seu veículo de recreio não é apenas elegante, mas também prática. Aqui estão os motivos pelos quais muitos motoristas de veículos recreativos optam por ela:
Em resumo, a instalação de painéis solares em veículos recreativos lhe dá independência e tranquilidade na estrada.
Ao montar painéis solares em seu veículo recreativo, escolher o sistema certo para começar pode lhe poupar muitos problemas no futuro. Não se trata de uma daquelas coisas em que um conjunto de planos dá conta de todas as situações; a configuração do sistema solar do seu veículo recreativo depende dos seus hábitos de viagem, da quantidade de eletricidade que você normalmente usa, do espaço que há no carro para isso e de quanto dinheiro você está disposto a gastar.
Portanto, antes de sair correndo para fazer furos no carro ou arrancar as fitas adesivas, vamos dar uma boa olhada nos principais componentes de um sistema solar inteligente para veículos recreativos. Depois de entender isso, você se sentirá mais confortável ao instalá-lo e ao usá-lo no futuro.
A primeira decisão na montagem de painéis solares em um veículo recreativo é selecionar o tipo de painel solar a ser usado. A maioria dos proprietários de veículos recreativos escolherá painéis monocristalinos ou policristalinos. Os painéis monocristalinos são elegantes, de cor preta brilhante e eficientes na geração de eletricidade, mesmo em condições de pouca luz, o que os torna ideais para quem deseja maximizar a produção de energia em um espaço menor. Os painéis policristalinos, por outro lado, geralmente são mais baratos, mas também um pouco menos eficientes.
Ao montar painéis solares em seu trailer, você também precisa considerar o projeto físico dos painéis. Os painéis solares rígidos são os mais duráveis e geralmente são instalados diretamente no teto do trailer. Eles são feitos com uma estrutura de alumínio e vidro temperado, o que os torna ideais para instalação permanente. Os painéis flexíveis podem ser mais adequados se o teto do seu trailer for curvo ou se o espaço for limitado. Eles são mais leves, cabem em superfícies irregulares e não exigem muito hardware de montagem - perfeitos para uma instalação oculta e de baixo perfil.
A escolha da opção certa quando se trata de instalação de painel solar para veículos recreativos exige muita reflexão. É preciso considerar o tipo de estrada em que se está dirigindo. Se a estrada for esburacada, os painéis solares precisarão ser suficientemente fortes ou se soltarão após alguns solavancos, portanto, a durabilidade é absolutamente essencial. Além disso, você precisa determinar a frequência com que precisará remover e instalar os painéis. Se você gosta de se movimentar e está procurando praticidade, os painéis solares dobráveis ou em forma de maleta podem ser mais em conta e mais fáceis de transportar.
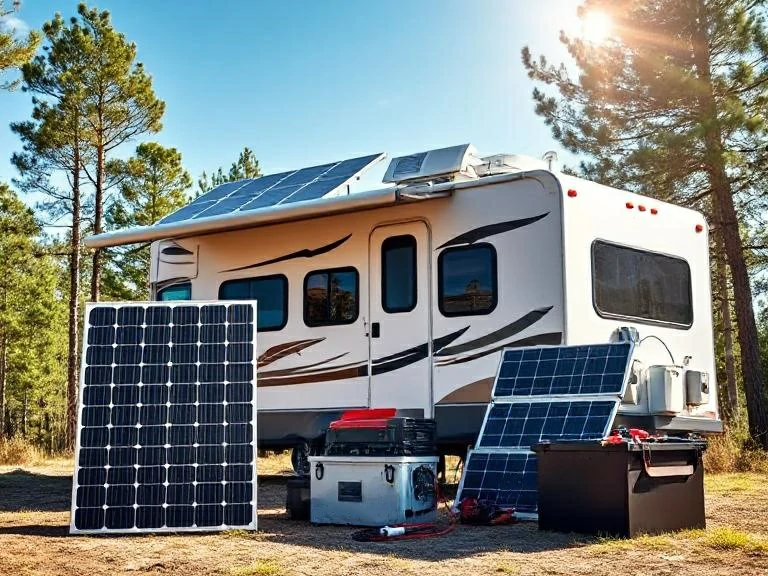
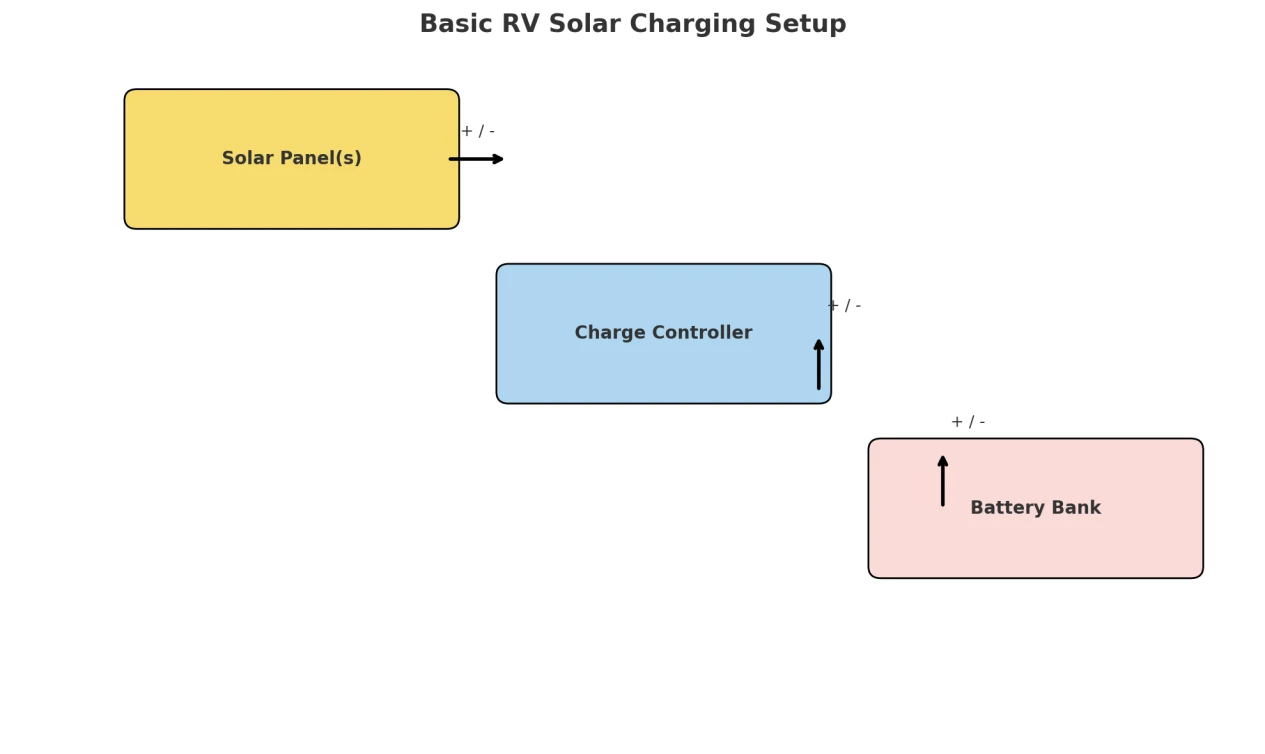
Vamos detalhar os componentes básicos de uma configuração solar completa para a montagem de painéis solares no veículo recreativo. Mesmo que você esteja apenas adicionando painéis solares ao seu veículo recreativo para fazer um boondocking leve, precisará de mais do que apenas painéis.
Um erro comum de principiante durante a montagem de painéis solares em um veículo recreativo é concentrar-se demais na potência do painel e ignorar o restante do sistema. É como escolher um motor de carro de corrida sem pensar se a transmissão e as linhas de combustível combinam. Para que o sistema solar de um veículo recreativo funcione de forma segura e eficiente, todos os componentes devem trabalhar juntos adequadamente, e é disso que se trata uma configuração verdadeiramente equilibrada.
Agora a grande questão: de quanta energia solar você realmente precisa?
Essa etapa é essencial antes do início da instalação do painel solar para veículos recreativos. Comece listando todos os dispositivos que usa regularmente - luzes, geladeira, bomba d'água, ventilador, carregadores, micro-ondas etc. - e descubra a potência e as horas de uso por dia. Multiplique esses números para estimar seu consumo diário de energia em watts-hora.
Digamos que você use 3.000Wh por dia. Se você instalar painéis solares de 300 watts e tiver cerca de 5 horas de pico de sol por dia, serão 1.500 Wh de um painel. Você precisaria de pelo menos dois desses painéis, e talvez um terceiro para dias nublados ou buffer extra.
Leve em conta também o tamanho da bateria. Não faz sentido montar painéis solares nos telhados do veículo recreativo que possam bombear mais energia do que as baterias podem suportar. Painéis grandes demais com baterias pequenas demais desperdiçarão energia, enquanto painéis pequenos demais o deixarão com pouca energia.
Você pode encontrar calculadoras on-line, mas as condições do mundo real (como sombreamento, calor e ângulo do painel) afetam a produção. Sempre superestime um pouco para se manter seguro, especialmente se você ficar fora da rede por dias seguidos.
Agora que você já fez sua lição de casa e escolheu seus painéis, está pronto para começar a montar painéis solares em seu trailer. Seja você um viajante que passa o ano inteiro na estrada ou um jogador que só viaja ocasionalmente nos fins de semana, colocar painéis solares em seu trailer é definitivamente uma ótima maneira de aprimorar sua experiência de viagem. À primeira vista, esse projeto parece bastante intimidador, mas, na verdade, desde que você tenha algumas coisas em mente e o material certo em mãos, não há problema algum em fazê-lo você mesmo.
Agora que você já fez sua lição de casa e escolheu seus painéis, está pronto para começar a montar painéis solares em seu trailer. Não importa se você viaja em tempo integral ou se vai passar o fim de semana fora, a montagem de painéis solares no seu trailer é uma das atualizações mais impactantes que você pode fazer no seu carro. À primeira vista, esse projeto parece bastante intimidador, mas, na verdade, desde que você tenha algumas coisas em mente e o material certo em mãos, não há problema algum em fazê-lo você mesmo.
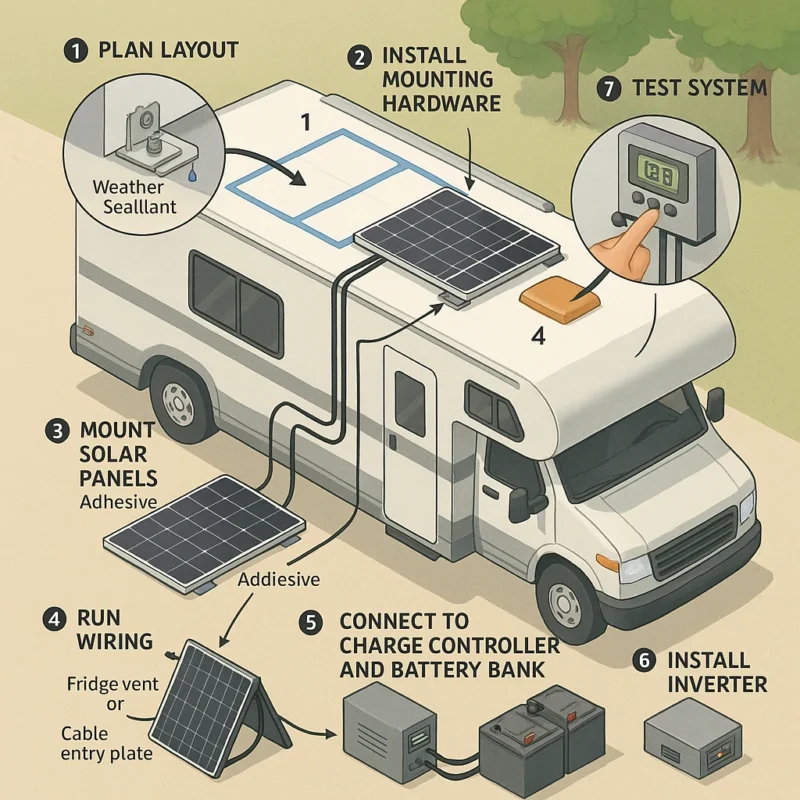
A seguir, apresentamos uma diretriz prática, concisa e passo a passo sobre como fazer a instalação de um painel solar para veículos recreativos no teto do seu veículo recreativo e como conectar corretamente todos os componentes.
Antes de tocar em uma furadeira ou desembalar os painéis, suba no telhado e visualize o layout para a montagem dos painéis solares no RV. Considere onde os painéis ficarão mais expostos ao sol durante o dia. Tente evitar áreas sombreadas por unidades de ar condicionado, antenas ou aberturas de ventilação.
Meça e planeje cuidadosamente o caminho da fiação. Se o seu sistema tiver vários painéis, não se esqueça de deixar algum espaço entre eles. Isso permite um fluxo de ar suave e facilita muito a limpeza. Planejar com antecedência evitará uma enorme dor de cabeça mais tarde durante a instalação do painel solar do seu RV.
Dica profissional: Use fita adesiva para delinear a posição de cada painel - um truque simples para ajudá-lo a identificar possíveis problemas de layout antes que eles se tornem problemas reais.
Em seguida, precisamos montar os painéis solares de forma segura no teto do carro. Se você optar por um painel rígido, como a maioria das pessoas faz, deverá usar um suporte em Z, um suporte angular ou um suporte de inclinação. A maioria dos kits vem com ferragens de aço inoxidável, mas não se esqueça de usar um pouco de selante contra intempéries, como Dicor ou selante de lapela, para vedar ao redor dos parafusos de modo que a chuva não possa entrar.
Se o teto do seu veículo recreativo não puder ser perfurado - ou se você simplesmente preferir evitá-lo -, há opções de adesivos como a fita VHB da 3M ou bases de montagem especializadas para instalar painéis solares em tetos de veículos recreativos sem perfurar a superfície. Essas opções funcionam especialmente bem para painéis leves ou flexíveis, mas somente quando combinadas com uma boa preparação da superfície e agentes de colagem adequados.
Limpe bem a superfície antes de aplicar o adesivo. Poeira, graxa e até mesmo um pouco de umidade podem enfraquecer a colagem.
Depois que o hardware de montagem estiver seguro, é hora de colocar os painéis. Certifique-se de que tudo esteja alinhado com seu plano gravado. Se estiver usando parafusos, não aperte demais - apenas o suficiente para manter as coisas firmes sem rachar a estrutura do painel.
Para instalações com adesivo, pressione com firmeza e aplique pressão uniforme. Dê ao adesivo o tempo de cura recomendado antes de dirigir o RV ou expô-lo à chuva.
Lembre-se de que essa é uma das partes mais permanentes do processo de instalação do painel solar para veículos recreativos, portanto, verifique novamente o posicionamento antes de finalizar.
Em seguida, você precisará passar os cabos dos painéis para o interior do veículo recreativo, onde ficará o controlador de carga. O método mais limpo é passar os fios pela abertura da geladeira ou por uma placa de entrada de cabos (que pode ser vedada à prova d'água).
Certifique-se de usar fios resistentes a raios UV classificados para uso externo e proteja-os com conduítes ou feixes de fios se estiverem expostos aos elementos. Rotule suas linhas positivas e negativas para evitar confusões mais tarde.
Essa parte pode exigir mais paciência, especialmente se o seu trailer tiver espaços apertados nas paredes, mas uma fiação limpa é mais segura e mais fácil de solucionar problemas no futuro.
Seus painéis solares alimentam o controlador de carga com energia CC, que regula a tensão e evita que as baterias sejam sobrecarregadas. A maioria dos sistemas exigirá um controlador de carga MPPT ou PWM - o MPPT é mais eficiente, especialmente para matrizes maiores.
Conecte os fios do painel ao controlador primeiro e, em seguida, conecte o controlador ao banco de baterias. Sempre conecte o lado da bateria por último para evitar curtos ou picos acidentais.
Verifique cuidadosamente as instruções do fabricante - a conexão de itens na ordem errada é uma das principais causas de fusíveis queimados ou equipamentos danificados ao adicionar painéis solares aos sistemas de veículos recreativos.
Se quiser alimentar aparelhos padrão de 120 V (cafeteiras, laptops, liquidificadores), você precisará de um inversor como parte da montagem dos painéis solares na configuração do RV. Os inversores de onda senoidal pura são ideais para eletrônicos sensíveis, enquanto os inversores de onda senoidal modificada são mais baratos, porém mais limitados.
Monte o inversor próximo ao banco de baterias para minimizar a perda de tensão. Utilize fios de calibre grosso e adicione fusíveis ou disjuntores para maior segurança. Alguns veículos recreativos vêm pré-cabeados para a conexão do inversor; se o seu não vier, consulte um eletricista para essa etapa.
Com tudo conectado, é hora de testar seu sistema. Ligue o controlador de carga, verifique a tensão da bateria e certifique-se de que os painéis solares estejam produzindo energia. Um dia ensolarado ajudará nesse caso, mas mesmo com luz parcial, você deverá ver alguma atividade.
Fique de olho nas leituras do seu controlador nos primeiros dias. Muitas unidades modernas permitem o monitoramento por Bluetooth via smartphone, o que é muito útil enquanto você está descobrindo como o novo sistema se comporta.
Se algo parecer estranho - como baixa tensão ou falta de carga - verifique novamente a fiação, a polaridade e as conexões.
A instalação de painéis solares em seu veículo recreativo pode parecer um grande projeto, mas é uma daquelas atualizações que valem a pena toda vez que você acampa fora da rede. É o tipo de independência que faz com que o esforço extra valha a pena.
E não se preocupe se o seu primeiro sistema não for perfeito - você sempre poderá expandi-lo mais tarde. A beleza da montagem de painéis solares em telhados de veículos recreativos é o fato de ser totalmente modular. Comece com pouco, construa à medida que avança e desfrute da satisfação tranquila de alimentar suas aventuras com a pura luz do sol.
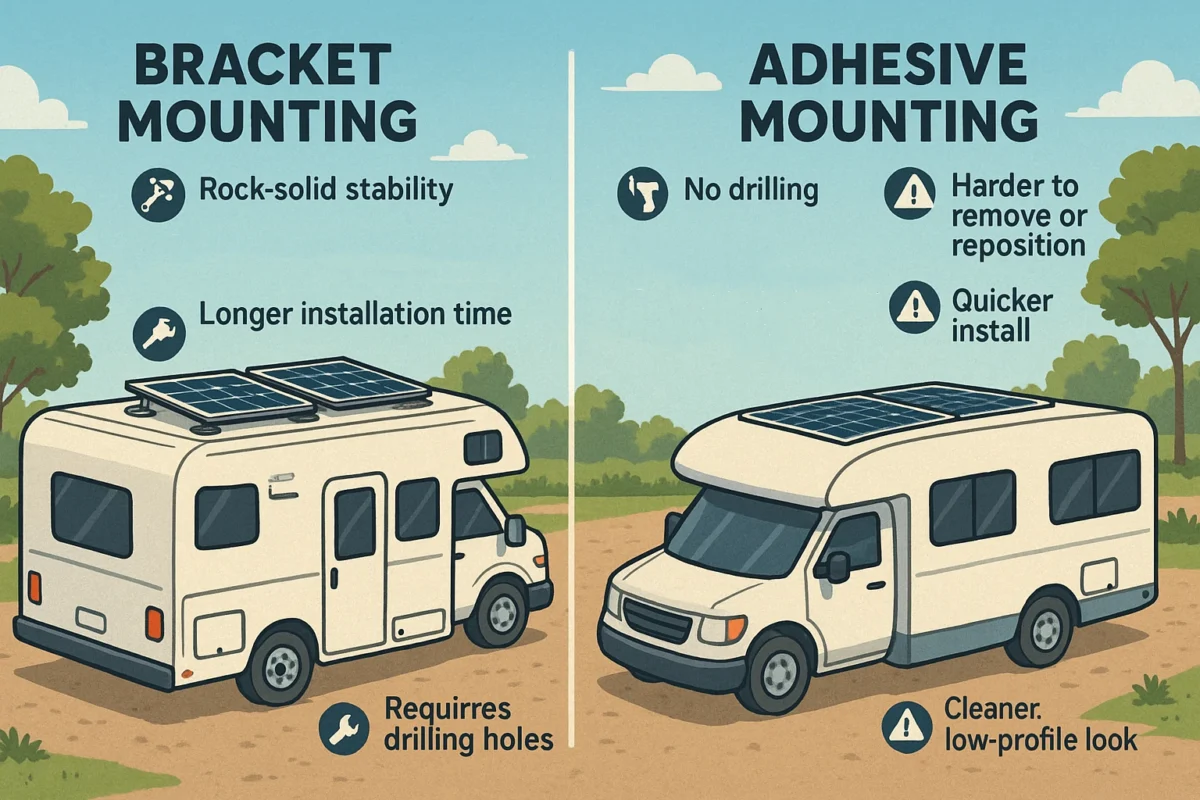
Quando se trata de montar painéis solares em um veículo recreativo, uma das primeiras opções práticas que você terá de enfrentar é como exatamente você vai fixar os painéis no seu equipamento. Você deve usar adesivos resistentes ou suportes de metal tradicionais? A resposta curta: depende do tipo de veículo, do estilo do painel e do grau de permanência que você deseja dar à instalação. Vamos analisar as duas opções para que você possa tomar a melhor decisão para sua configuração específica.
Os suportes - especialmente os suportes em Z, suportes em L ou suportes de inclinação - são, de longe, o método de montagem mais comumente usado na instalação tradicional de painéis solares em veículos recreativos. Eles fornecem uma conexão mecânica sólida entre o painel solar e o teto do veículo recreativo, geralmente usando parafusos e porcas de aço inoxidável.
Esse método envolve perfurar o teto, o que, compreensivelmente, deixa alguns proprietários de veículos recreativos um pouco nervosos. Mas, se feito corretamente, com selante de alta qualidade e colocação correta, ele cria uma fixação duradoura e resistente às intempéries que resiste a ventos fortes e estradas irregulares.
Prós da montagem em suporte:
Contras:
Se você quer mesmo saber como instalar painéis solares em telhados de trailers de forma durável e segura, os suportes são uma solução testada e comprovada.
A montagem adesiva ganhou popularidade, especialmente entre os moradores de vans e trailers com telhados de fibra de vidro ou superfícies curvas. Adesivos industriais fortes como a fita VHB da 3M ou almofadas de montagem especializadas possibilitam a fixação de painéis sem um único furo.
Os painéis flexíveis ou semiflexíveis são a melhor opção, pois são mais leves e podem se moldar ao formato do teto de seu veículo recreativo. Alguns kits de painéis rígidos vêm até mesmo com suportes de canto compatíveis com adesivos que combinam a conveniência de descascar e colar com um pouco de estrutura extra.
Prós da montagem com adesivo:
Contras:
Para os guerreiros de fim de semana ou proprietários de veículos recreativos que estão apenas adicionando painéis solares às configurações do veículo recreativo temporariamente - ou que alugam seu equipamento -, o adesivo pode ser a maneira mais não invasiva de fazer isso. Apenas certifique-se de seguir atentamente as instruções do produto e preparar bem a superfície. Poeira, graxa ou até mesmo umidade leve podem reduzir drasticamente a força de adesão.
O negócio é o seguinte: ambos os métodos podem funcionar muito bem quando feitos corretamente. Se estiver montando painéis flexíveis em um teto curvo de uma van Classe B e quiser evitar furos a todo custo, a montagem adesiva é sua melhor amiga. No entanto, se estiver instalando vários painéis rígidos de 100W ou 200W em um teto plano de um veículo recreativo e estiver disposto a fazer isso a longo prazo, os suportes oferecerão mais tranquilidade.
Muitos motoristas de veículos recreativos combinam os dois métodos - usando suportes para aumentar a resistência e um pouco de adesivo para amortecer ainda mais a vibração. A configuração é sua, a estrada é sua, as regras são suas.
No final das contas, a instalação de painéis solares para veículos recreativos não se resume a colocar alguns painéis no teto e encerrar o dia. O método de montagem escolhido desempenha um papel fundamental no desempenho, na segurança e na longevidade. Portanto, pondere suas opções com cuidado e não economize - literal ou figurativamente.
Então, é melhor conectar os painéis solares do RV em série ou em paralelo? Isso depende do tamanho e do layout do seu sistema, mas muitos optam por uma abordagem híbrida.
A conexão de painéis solares para carregar a bateria do veículo recreativo é uma das etapas mais essenciais em qualquer instalação de painel solar para veículos recreativos. Pode parecer técnico, mas, depois de analisado, o processo é bastante simples, mesmo para iniciantes.
Depois de montar os painéis solares em seu veículo recreativo, você passará os fios positivos e negativos dos painéis para um controlador de carga solar. Esse dispositivo é o cérebro do sistema - ele regula a tensão e a corrente dos painéis para garantir que as baterias sejam carregadas com segurança sem sobrecarga.
A partir do controlador de carga, conecte os cabos ao banco de baterias do seu RV. A maioria das configurações usa baterias de ciclo profundo de 12V ou 24V, dependendo do tamanho do sistema. Certifique-se de combinar as polaridades (positivo com positivo, negativo com negativo) e de fundir as linhas para proteção.
Se estiver se perguntando como instalar painéis solares em telhados de veículos recreativos e conectá-los adequadamente, lembre-se desta regra de ouro: as conexões da bateria sempre vêm por último. Isso mantém você e seus componentes seguros durante a instalação.
Quer você esteja adicionando um único painel ou fazendo upgrade para um conjunto solar completo, as conexões adequadas fazem toda a diferença na obtenção de energia confiável e fora da rede.
Tecnicamente, sim, mas essa não é a maneira mais segura ou eficiente. Alguns painéis portáteis vêm com um plugue RV (como um acendedor de cigarros ou um conector SAE), permitindo a conexão direta. Embora isso possa recarregar sua bateria lentamente, não há regulagem de tensão e coloca seu sistema em risco.
Uma instalação adequada de painel solar para veículos recreativos sempre inclui um controlador de carga solar entre o painel e a bateria. Isso protege seu sistema elétrico contra sobrecarga e aumenta a vida útil da bateria. Se estiver montando painéis solares em telhados de veículos recreativos ou atualizando sua configuração, não é recomendável ignorar o controlador.
Portanto, embora o plug-and-play possa funcionar em um piscar de olhos, uma instalação completa com fiação, fusíveis e regulagem adequados é a medida mais inteligente a longo prazo, especialmente se você estiver pensando seriamente em sair da rede.
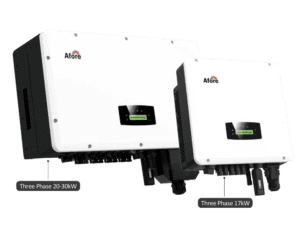
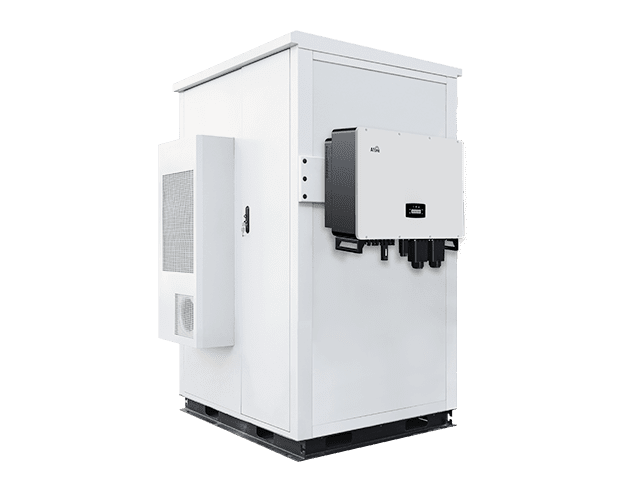
A propósito, se quiser instalar um inversor em sua casa ou fábrica, você pode dar uma olhada nos inversores solares da Afore, uma empresa bem conhecida. fabricante de inversores solares. A Afore oferece uma ampla variedade de inversores solares confiáveis e de alto desempenho para aplicações móveis e fora da rede.
A montagem de painéis solares em um veículo recreativo não é um negócio do tipo "configure e esqueça".
Seu sistema lhe agradecerá com uma vida útil mais longa e melhor desempenho.
A maioria dos proprietários de veículos recreativos opta por instalar um suporte ou usar um adesivo forte para manter seus painéis solares no lugar. Os suportes são resistentes e duráveis e oferecem um suporte estável para painéis solares rígidos, o que os torna uma ótima opção. Os adesivos, por outro lado, são especialmente bons para painéis solares leves ou dobráveis, principalmente se você não quiser fazer buracos na carroceria do veículo.
A fita VHB da 3M e a Sikaflex 252 são duas das opções mais populares. Elas oferecem ligações fortes e resistentes a intempéries, ideais para a montagem de painéis solares em telhados de veículos recreativos sem perfuração.
Depende dos objetivos de seu sistema. A conexão em série aumenta a tensão e é melhor para longas extensões de cabos. A conexão paralela mantém a tensão baixa e permite que o sistema continue funcionando mesmo se um painel estiver sombreado. Alguns sistemas para veículos recreativos usam uma combinação das duas opções.
Sim, mas somente em configurações temporárias e de baixa potência. Para um carregamento confiável e seguro, sempre passe seu painel solar por um controlador de carga antes de conectá-lo à bateria do veículo recreativo.
Conecte o painel solar a um controlador de carga e, em seguida, do controlador à bateria. Essa configuração protege sua bateria e garante um carregamento eficiente. Nunca conecte os painéis diretamente à bateria sem regulagem.
Use adesivo de grau industrial, como a fita VHB da 3M, para painéis flexíveis ou semiflexíveis. Limpe bem a superfície e aplique pressão uniformemente. Para aumentar a resistência, alguns motoristas de veículos recreativos usam uma combinação de adesivo e suportes.
A configuração mais eficiente depende de seu sistema específico. Muitos motoristas de veículos recreativos preferem a fiação em série-paralela para equilibrar a tensão e a amperagem. O uso de um controlador de carga MPPT de qualidade também aumenta a eficiência.
Depende de seu consumo de energia. Um campista de fim de semana pode se dar bem com 200-400W, enquanto os campistas em tempo integral geralmente precisam de 600-1000W ou mais. Acompanhe seu consumo diário de energia e o tamanho do banco de baterias para determinar o sistema ideal.
Apenas parcialmente. A eficiência dos painéis diminui significativamente na sombra. Se você costuma acampar embaixo de árvores, considere o uso de painéis portáteis que possam ser movidos para o sol ou construa mais painéis solares para compensar esse problema.
Sim! A instalação de painéis solares em veículos recreativos é muito comum. Com as ferramentas certas, um pouco de pesquisa e paciência, a maioria das pessoas consegue montar com segurança os painéis solares nos telhados dos veículos recreativos e fazer a fiação dos sistemas em casa.